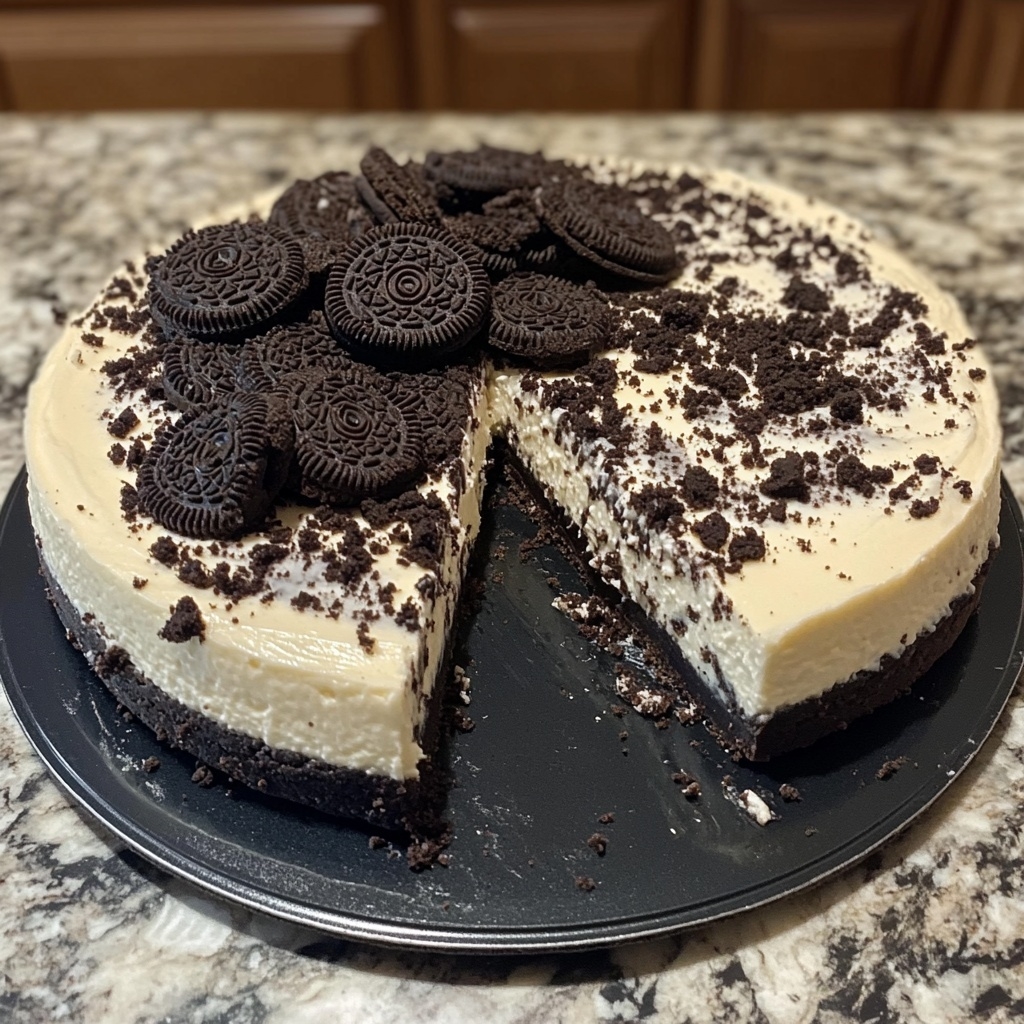
Peppermint Swirl Fudge is a creamy white chocolate fudge with ribbons of pink peppermint and little crunchy candy cane bits on top. It’s sweet, smooth, minty, and takes about 10 minutes to put together. No baking, no thermometer, no drama.

This is the kind of treat you make for holiday trays, school parties, neighbor gifts, or just “I want something Christmassy right now.” It sets in the fridge, slices clean, and looks like you spent hours — even though you didn’t.

Below you’ll find exactly how to make it, how to get that pretty swirl, how to avoid grainy fudge, how to store it, and how to package it for gifting.

Why You’ll Love This Peppermint Swirl Fudge

  • No-bake, low effort: You melt, stir, swirl, chill. That’s basically it.
  • Beautiful: The red/pink swirl and crushed peppermint on top look super festive without extra decorating.
  • Kid-friendly + party-friendly: Smooth and sweet with just enough peppermint to taste like the holidays.
  • Great for gifting: It slices into perfect squares you can box or bag.
  • Holds well in the fridge: You can make it ahead for Christmas, parties, cookie exchanges, etc.

Ingredients

  • White chocolate chips – about 3 cups (roughly 18 oz / 510 g)
    Use good quality white chocolate chips or chopped white chocolate bars. Cheap “white candy coating” will be more waxy.
  • Sweetened condensed milk – 1 (14 oz / 397 g) can
    This is what makes the fudge smooth and sets it without needing a candy thermometer.
  • Butter – 2 tablespoons, unsalted
  • Peppermint extract – 1/2 teaspoon
    This gives it that candy cane flavor. Use peppermint, not spearmint.
  • Red or pink gel food coloring – just a few drops for the swirl
  • Crushed candy canes or peppermint candies – 2–3 tablespoons, for topping
  • Pinch of salt (optional but helps balance the sweetness)

Optional:

  • Vanilla extract – 1/2 teaspoon, for extra warmth and bakery-style flavor

How to Make Peppermint Swirl Fudge

1. Prep your pan

Line an 8×8 inch (20×20 cm) square pan with parchment paper, leaving a little overhang so you can lift the fudge out later.

Lightly mist or butter the parchment if you’re worried about sticking.

2. Melt the base

In a medium saucepan over low heat, add:

  • white chocolate chips
  • sweetened condensed milk
  • butter

Stir constantly while it melts. Keep the heat low and patient — white chocolate burns faster than regular chocolate.

Once smooth and fully melted, remove from heat.

Stir in:

  • peppermint extract
  • vanilla extract (if using)
  • pinch of salt

This is your fudge base.

Tip: If the mixture looks thick/greasy and separated, it’s usually from too-high heat. Take it off the heat immediately and stir hard to bring it back together. Low heat is everything here.

3. Tint a small portion for the swirl

Scoop about 1/3 cup of the fudge mixture into a small bowl.

Add a tiny drop or two of red or pink gel food coloring and stir until it’s evenly tinted. This is your swirl color.

Leave the rest of the fudge white.

4. Pour and swirl

Pour the plain (white) fudge mixture into your prepared pan and smooth the top.

Spoon small dollops of the pink fudge on top. Take a butter knife or toothpick and gently drag it through the surface to create swirls. Don’t overmix or you’ll lose the pattern — 3–4 slow passes is enough.

5. Add the peppermint topping

Sprinkle crushed candy canes or crushed peppermint candies evenly over the top. Press them very lightly so they stick.

This gives you that little crunch on top when you bite it.

6. Chill and slice

Refrigerate for at least 2–3 hours, or until firm enough to slice.

Once set, lift the fudge out of the pan using the parchment overhang. Cut into small squares with a sharp knife.

Wipe the knife between cuts for super clean edges.

That’s it — plate it, box it, gift it, snack on it.

Serving Ideas for Peppermint Swirl Fudge

This fudge is sweet, so small pieces are perfect. Serve it:

  • On a holiday dessert board with cookies and truffles
  • With hot cocoa or peppermint mocha
  • As part of “Christmas tins” for neighbors, teachers, coworkers
  • At a cookie swap (even though it’s not a cookie, nobody complains)

It also looks amazing on a platter with brownies, chocolate bark, and chocolate-dipped pretzels.

Cook’s Tips

Use low heat.
White chocolate can scorch fast. Melt slow and stir constantly.

Line the pan.
Do not skip the parchment. It lets you lift the whole block out in one piece and slice it pretty.

Use gel color, not liquid.
Gel food coloring gives strong color with just a tiny bit, so it won’t thin out the fudge.

Crush the candy canes small.
Big chunks look cute but are hard on your teeth. Light sprinkle of fine pieces = perfect.

Let it fully chill before slicing.
If you slice while it’s still warm and soft, it can smear and drag instead of cutting clean.

Variations & Add-Ins

  • Chocolate-Peppermint Layer:
    Do half white chocolate fudge and half semi-sweet chocolate fudge, stacked.
  • Cookies & Cream Peppermint:
    Fold in some crushed chocolate sandwich cookies (like Oreos) before pouring into the pan.
  • Extra Minty:
    Add extra peppermint extract, up to 3/4 teaspoon total. Be careful — too much can taste medicinal.
  • Marshmallow Fudge:
    Stir in mini marshmallows right before pouring into the pan. They’ll stay soft and bouncy inside.
  • No food coloring version:
    Skip the swirl and just top with crushed candy canes. Still festive and easier.

Storage & Gifting

Room temperature:
This fudge can sit covered at cool room temperature for 2–3 days, which makes it great for treat boxes and gifting.

Fridge:
Store in an airtight container for up to 1 week. The fridge keeps it firm and easy to slice.

Freezer:
Freeze (wrapped well) for up to 1 month. Thaw in the fridge, not on the counter, so it doesn’t “sweat.”

Gifting tip:
Put squares in mini cupcake liners so they don’t stick together in a tin.

FAQ

Does this taste like toothpaste mint?
No. Peppermint extract plus sweet white chocolate and vanilla gives more “candy cane hot cocoa” than “toothpaste.” Just don’t go heavy on the extract.

Can I use milk chocolate instead?
You can, but it won’t be “peppermint swirl fudge” anymore — it’ll come out more like chocolate peppermint fudge. Still good, just a different look.

Can I make this without peppermint?
Yes. Use vanilla extract only, skip the crushed candy canes, and don’t tint part of the fudge. You’ll get a plain vanilla swirl fudge.

Why is my fudge grainy?
Usually too much heat or using imitation “white candy coating” instead of real white chocolate. Melt slow and smooth.

Peppermint Swirl Fudge is one of those holiday recipes that looks bakery-level but is honestly beginner-friendly. You don’t need a candy thermometer, you don’t need special tools, and it sets right in the fridge.

Make one pan for a party tray and another pan “for quality control.” Cut them small — they’re rich, creamy, minty, and they disappear fast.

This is an easy win for cookie boxes, school events, last-minute gifts, or just a cozy night with hot chocolate and a movie.

Peppermint Swirl Fudge (No-Bake Holiday Treat – Creamy, Festive, and So Easy)

Servings: 25-36
Prep:
Total:

Creamy white chocolate fudge with peppermint flavor, pink holiday swirls, and crunchy crushed candy cane on top. No-bake, no thermometer, and perfect for gifting, parties, and Christmas dessert trays.

Ingredients

  • 3 cups white chocolate chips (about 18 oz / 510 g)
  • 1 (14 oz / 397 g) can sweetened condensed milk
  • 2 tablespoons unsalted butter
  • 1/2 teaspoon peppermint extract
  • 1/2 teaspoon vanilla extract (optional)
  • Pinch of salt
  • Red or pink gel food coloring (just a drop or two)
  • 2–3 tablespoons crushed candy canes or peppermint candies

Instructions

  1. 1. Prepare pan:
  2. 2. Line an 8x8 inch (20x20 cm) baking pan with parchment, leaving overhang.
  3. 3. Melt base:
  4. 4. In a saucepan over low heat, melt white chocolate chips, sweetened condensed milk, and butter together. Stir constantly until smooth. Remove from heat and stir in peppermint extract, vanilla (if using), and a pinch of salt.
  5. 5. Tint a portion:
  6. 6. Scoop about 1/3 cup of the fudge into a small bowl. Add a drop or two of gel food coloring and stir to make a pink/red fudge for swirling.
  7. 7. Pour and swirl:
  8. 8. Pour the plain fudge into the lined pan and smooth. Drop spoonfuls of the tinted fudge on top and gently swirl with a butter knife or toothpick. Don’t overmix.
  9. 9. Top:
  10. 10. Sprinkle crushed candy canes over the surface and press lightly so they stick.
  11. 11. Chill:
  12. 12. Refrigerate 2–3 hours, or until firm. Lift out using parchment and slice into squares with a sharp knife.

Notes

Go slow with the heat — white chocolate burns easily.
For cleaner cuts, wipe the knife between slices.
Store chilled for the cleanest texture, but it’s fine at cool room temp for serving.

Nutrition

Estimate per square: ~140–170 calories, ~7g fat, ~18g carbs, ~2g protein.
Exact numbers change with brand of chocolate and how large you cut the fudge.